

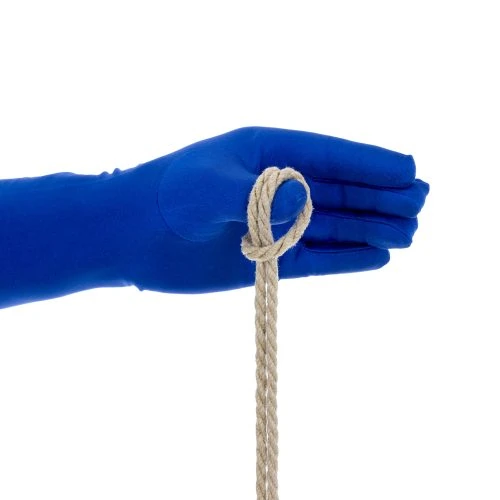
This popular reverse-tension single column tie is attractive, lies relatively flat, and is very secure.
Single Column ties create a non-collapsing cuff, belt, strap or band around any one thing.
- Wrist
- Ankle
- Thighs
- Knee
- Waist
- Chest
This is the starting point for many ties, like the Unchastity Belt (Crotch Rope) and the Stirrup Heel Tie. (Here on TheDuchy we sometimes abbreviate “Lark’s Head Single Column” to “LHCS”.)
Reverse-tension Single Columns are slower than forward-tension styles like the Somerville Bowline as they require tail pulls (the entire length of the rope must be pulled through some part of the knot while tying, in this case 2-3 times) That said, this tie is also less bulky and some find it more attractive. It cannot be untied without freeing the tail (this can be a good thing or a bad thing, depending on the situation).
Important Safety Tip! Wrists are sensitive, they must be handled with care.
- They have a lot of nerve and blood vessels near the skin on the inside of the wrists. Too much pressure there can impact blood flow or nerve conduction. Cuffs should never be too tight; you should always be able to run two fingers under a cuff.
- The wrist joint itself is also fragile. If you pull on wrists too hard, you can damage that joint or even push some of those small wrist bones into the wrong position. NEVER suspend someone by the wrists alone. Never tie someone in a position where rope is a applying heavy continual stress on the wrists.
- An example of this might be if you tied your partner’s wrists to the bedposts, then grabbed their feet and pulled them sharply toward the foot of the bed. In that scenario, you may end up applying too much pressure to the wrist joints. Tying your partner to a bed can be amazing fun, but make sure there is enough slack in the tie that they can move their arms and wrists enough to adjust the lay of the cuff and rope strands from time to time.

For this tutorial, I used one 10′ (~3m) piece of Natural 1/4″ (6mm) hemp.
For most ties on this site, I use an amazing Natural hemp rope provided by my affiliate Twisted Monk. Check them out!

Prerequisites:
Video Contents:
- Creating the Cuff (0:44)
- Locking the Cuff, Forward-tension Style (4:04)
- Locking the Cuff, Reverse-tension Style (6:16)
Hi, its very clear. Apart aesthetism, does this single colum often use compare to the somervile one ?
Thank you
This question is answered in the tutorial above, in the paragraph that begins “Reverse-tension Single Columns are slower…” If you have further questions beyond that, let me know!
The triangle is such a clean look! I finally got this one after a handful of tries, and it’s kind of great. Thanks!
Hello I have a question about locking bandswrapscuffs off. I notice in the older version here that you lock off by pulling the tail UNDER the cuff then leading it back over the cuff and through the loop. This seems to be the same general idea as in your Locking off a Strap video on the Half-Hitch tutorial page both for the reverse and forward tension examples as well as in the Bondage Belt w Happy Strap and Unchastity Belt tutorials. In the newer version here though for both the forward and reverse tension versions you start by bringing the tail OVER the cuff then leading it back under the cuff and through the loop. The Prusik Single Column tutorial seems to have this same general idea too. What Im wondering is if there is a significant difference between the under cuff first and over cuff first approaches to locking off. I want to make sure Im not missing something important especially if there are safety considerations
Assuming you make sure that all the strands in the cuff have the same tension and are not too tight, there is no real safety difference*, these are all just half hitches locking off the strap.
* One could argue that reversing tension one last time before locking off with a half hitch has a marginal safety edge in that it adds more friction, but it also adds significantly more bulk, which represents a risk too if it tension is added to the tail in such a way that the bulky knot is pressed into the skin in a sensitive area. So I prefer the less bulky version for tails running parallel to the column and I use the Somerville Bowline when the tail is going to run perpendicular to the column.
As a more experienced person and me just learning how would you determine which knot to use. What would determine that I want to use the forward over the reverse. I just needed so clarification.
I need to put together a post on this! Generally, Reverse SCs are good for greater security. They cannot be untied without releasing the tail. They also have a certain look that some prefer. Forward SC, can be tied or untied without releasing the tail. This can be a great safety feature. When “slipped” (as in a Slipped Somerville Bowline), it can allow for a quick release. Check out the Malasana tie for an example.
Is there a way to add additional wraps to this?
Yes. Most riggers tend to stop at 2 wraps (4 cords) or 3 wrap (6 cords) because beyond that the cords tend to start bunching up when you lock them off with the half hitch. That said, I have seen people do many wraps and just account for the bunching by adding a little more slack.
Followup question!
If I were to try a third wrap, would I have to pass the tail through the beginning of the wrapping (so only under two ropes, the ones close to the lark’s head), or should I pass it under both of the other wraps (so under 4 ropes)?
Man, this is complicated to put into words… I’m not sure I explained myself.
I’m still going to try this on myself, but I wanted to get an expert opinion first.
No worries. In Step 5 (after reversing tension), wrap twice instead of once as shown. Then continue on with the rest of steps at shown. In Steps 9-10, go under all 6 strands instead of the shown 4.
I am planning an update of this tutorial sometime in the next few months. I will add this variant to the new version!
Hello! I am new to all this, but just wanted to say I find your site awesome and really helpfull, cheers! 🙂
Hello! I was curious about a part of this tie, after step 8. I notice that the tension is not reversed before locking off the tie with a half hitch. I was previously taught to always reverse the tension before locking it off, so I was curious about the potential advantage/disadvantage of doing so.
Good Question! Both work fine. The advantage of doing it this way is mostly aesthetic (I think it looks nicer) but it is also a bit less bulky. The advantage of adding the reverse before doing you half-hitch is that it is a little easier to set and maintain your tension while locking off the cuff. I personally find that the difference is minimal though. But you raise a good point! I will update the tutorial itself with this comment.
[…] a single column tie (a step-by-step photo tutorial) […]
[…] This is a proper knot!… […]
This is a proper knot!